Cocos Creator 脚本用于实现用户定义的(游戏)行为,支持 JavaScript 和 TypeScript 两种编程语言。通过编写脚本组件,并将它挂载到场景节点中来驱动场景中的物体。
在组件脚本的编写过程中,开发者可以通过声明属性,将脚本中需要调节的变量映射到 属性检查器 中,以便策划和美术进行调整。与此同时,也可以通过注册特定的回调函数,来帮助初始化、更新甚至销毁节点。
语言支持 #
Cocos Creator 支持 TypeScript 和 JavaScript 两种编程语言。但需要注意的是,JavaScript 只支持以插件脚本的形式导入使用。
Cocos Creator 支持 TypeScript 4.1.0,使用时有以下需要注意:
-
不支持 const enums。
-
重导出 TypeScript 类型和接口时应该使用
export type。例如使用export type { Foo } from './foo';而不是export { Foo } from './foo';。 -
不支持
export =和import =。 -
命名空间导出的变量必须声明为
const,而不是var或let。 -
同一命名空间的不同声明不会共享作用域,需要显式使用限定符。
-
编译过程中的类型错误将被忽略。
-
编译时不会读取
tsconfig.json,意味着tsconfig.json的编译选项并不会影响编译。
脚本使用 #
创建脚本 #
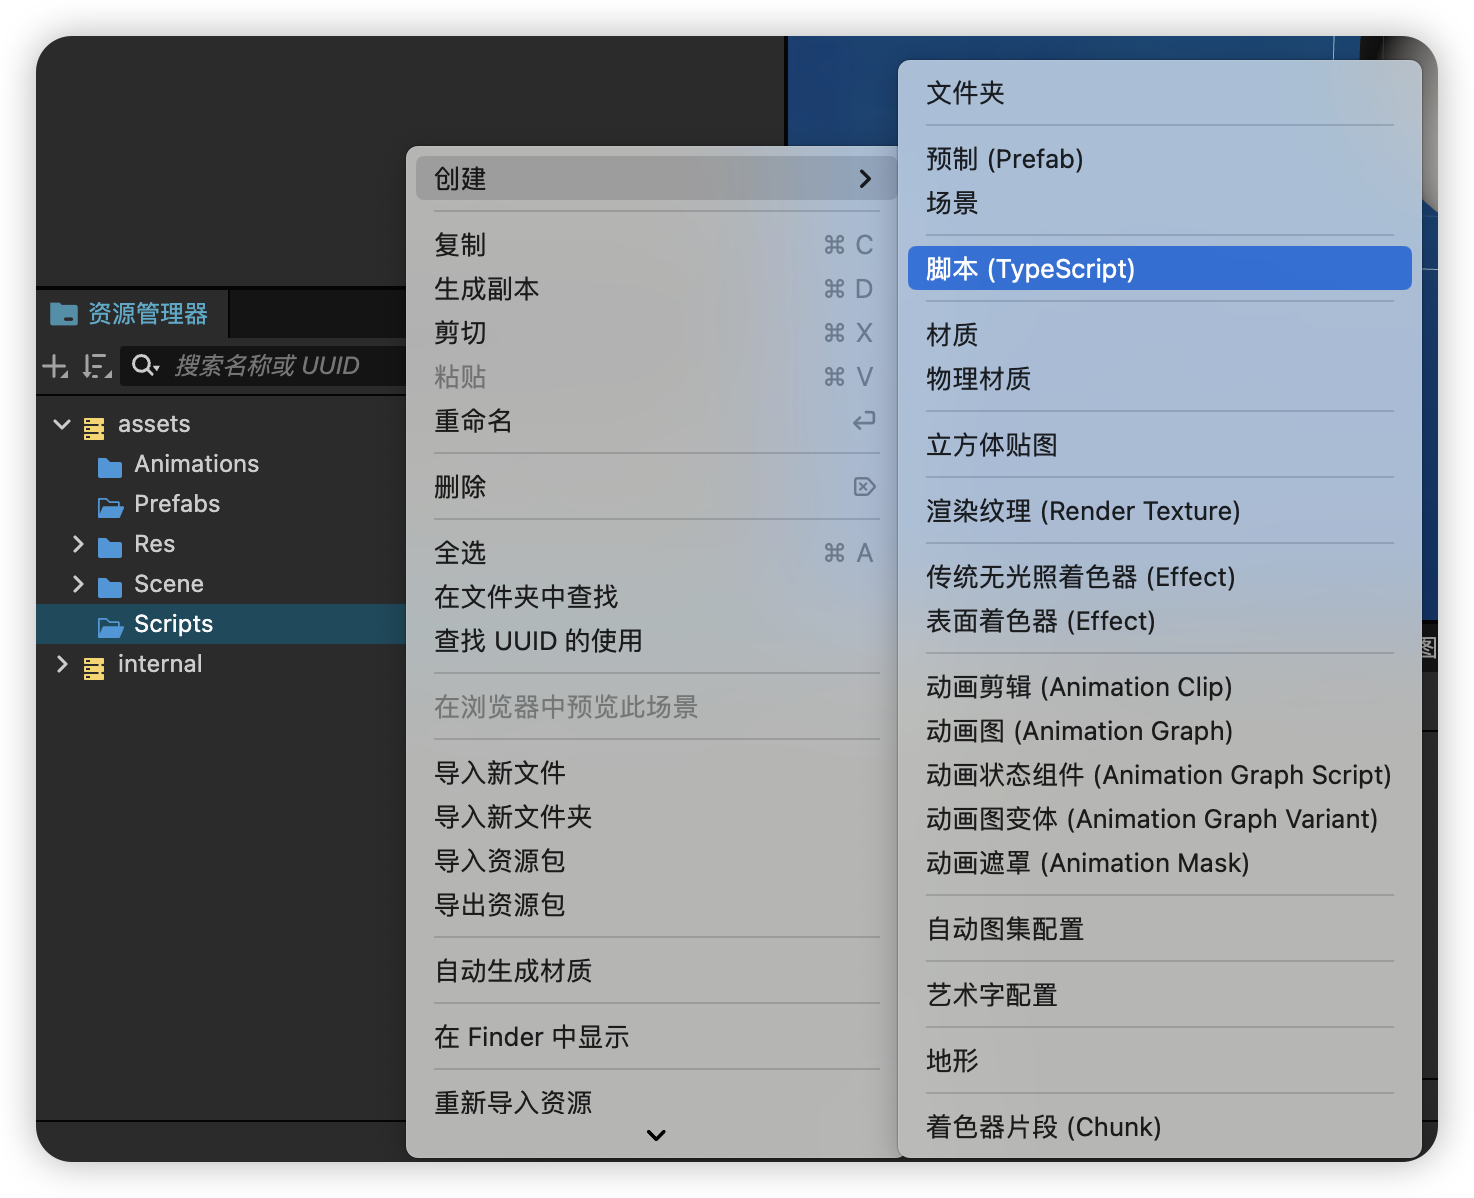
在创建脚本时,名称不能为空,输入框默认为 NewComponent。
import { _decorator, Component, Node } from 'cc';
const { ccclass, property } = _decorator;

@ccclass('NewComponent')
export class NewComponent extends Component {
   start() {

   }

   update(deltaTime: number) {

   }
}
- 项目中所有脚本的类名
ClassName(如上例中的NewComponent) 不允许重复,即使脚本文件在不同的目录下,各自的代码里也不允许有相同的类名。 - 脚本文件名称和脚本的类名不同,在输入初始的文件名之后,文件名会被处理为类名。脚本文件生成后,对文件的后续操作脚本重命名,新的文件名不会再去生成并替换代码里的类名,不再影响了。
- 我们推荐用户使用 TypeScript 来编写脚本,目前 资源管理器 中仅支持创建 TypeScript 文件。但如果用户想要使用 JavaScript 来编写脚本的话,可以直接在操作系统的文件夹中创建 JavaScript 文件,或在其他代码编辑软件中创建 JavaScript 文件。
添加脚本到场景节点中 #
将脚本添加到场景节点中,实际上就是为这个节点添加一个脚本组件。
在 层级管理器 选中某个节点,此时 属性检查器 面板会显示该节点的属性。以下两种添加方式:
- 直接将 资源管理器 中的脚本拖拽当前节点的到 属性检查器 中,即为挂载了一个组件。
- 点击 属性检查器 最下方的 添加组件 按钮,选择(自定义脚本 - NewComponent),即为挂载组件。
脚本运行环境 #
Cocos Creator 3.0 引擎的 API 都存在模块 cc 中,使用标准的 ES6 模块导入语法将其导入:
import {
    Component,  // 导入类 Component
    _decorator, // 导入命名空间 _decorator
    Vec3 // 导入类 Vec3
} from 'cc';

// 将整个 Cocos Creator 模块导入为命名空间 Cocos Creator
import * as modules from 'cc';

@_decorator.ccclass("MyComponent")
export class MyComponent extends Component {
    public v = new Vec3();
}
注意,由于历史原因,cc 是 Cocos Creator 3.0 保留使用的标识符,其行为 相当于 在任何模块顶部定义了名为 cc 的对象。因此,开发者不应该将 cc 用作任何 全局对象 的名称。
装饰器 #
ccclass #
将装饰器 ccclass 应用在类上时,此类称为 cc 类。cc 类注入了额外的信息以控制 Cocos Creator 对该类对象的序列化、编辑器对该类对象的展示等。因此,未声明 ccclass 的组件类,也无法作为组件添加到节点上。
ccclass 装饰器的参数 name 指定了 cc 类的名称,cc 类名是 独一无二 的,这意味着即便在不同目录下的同名类也是不允许的。
组件类装饰器 #
此类装饰器是只能用来修饰 Component 的子类。
executeInEditMode #
默认情况下,所有组件都只会在运行时执行,也就是说它们的生命周期回调在编辑器模式下并不会触发。executeInEditMode 允许当前组件在编辑器模式下运行,默认值为 false。
const { ccclass, executeInEditMode } = _decorator;

@ccclass('Example')
@executeInEditMode(true)
export class Example extends Component {
    update (dt: number) {
        // 会在编辑器下每帧执行
    }
}
requireComponent #
requireComponent 参数用来指定当前组件的依赖组件,默认值为 null。当组件添加到节点上时,如果依赖的组件不存在,引擎会自动将依赖组件添加到同一个节点,防止脚本出错。该选项在运行时同样有效。
const { ccclass, requireComponent } = _decorator;

@ccclass('Example')
@requireComponent(Sprite)
export class Example extends Component {
}
executionOrder #
executionOrder 用来指定脚本生命周期回调的执行优先级。小于 0 的脚本将优先执行,大于 0 的脚本将最后执行。
- 对于同一节点上的不同组件,数值小的先执行,数值相同的按组件添加先后顺序执行
- 对于不同节点上的同一组件,按节点树排列决定执行的先后顺序
该优先级设定只对 onLoad、onEnable、start、update 和 lateUpdate 有效,对 onDisable 和 onDestroy 无效。
const { ccclass, executionOrder } = _decorator;

@ccclass('Example')
@executionOrder(3)
export class Example extends Component {
}
disallowMultiple #
同一节点上只允许添加一个同类型(含子类)的组件,防止逻辑发生冲突,默认值为 false。
const { ccclass, disallowMultiple } = _decorator;

@ccclass('Example')
@disallowMultiple(true)
export class Example extends Component {
}
menu #
@menu(path) 用来将当前组件添加到组件菜单中,方便用户查找。
需要注意该菜单是添加在 属性检查器 面板中按下添加组件按钮后的下拉框内。
const { ccclass, menu } = _decorator;

@ccclass('Example')
@menu('foo/bar')
export class Example extends Component {
}
属性装饰器 #
属性装饰器 property 可以被应用在 cc 类的属性或访问器上。属性装饰器用于控制 Cocos Creator 编辑器中对该属性的序列化、属性检查器 中对该属性的展示等。
@property({
    type: Node,
    visible: true,
})
targetNode: Node | null = null;
生命周期 #
Cocos Creator 为组件脚本提供了生命周期的回调函数。开发者只需要定义特定的回调函数,Creator 就会在特定的时期自动执行相关脚本,开发者不需要手工调用它们。
目前提供给开发者的生命周期回调函数主要有(按生命周期触发先后排列):
- onLoad
- onEnable
- start
- update
- lateUpdate
- onDisable
- onDestroy
onLoad #
组件脚本的初始化阶段,我们提供了 onLoad 回调函数。onLoad 回调会在节点首次激活时触发,比如所在的场景被载入,或者所在节点被激活的情况下。在 onLoad 阶段,保证了你可以获取到场景中的其他节点,以及节点关联的资源数据。onLoad 总是会在任何 start 方法调用前执行,这能用于安排脚本的初始化顺序。
import { _decorator, Component, Node, SpriteFrame, find } from 'cc';
const { ccclass, property } = _decorator;

@ccclass("test")
export class test extends Component {
    @property({type:SpriteFrame})
    bulletSprite=null;
    @property({type:Node})
    gun=null;

    _bulletRect=null;

    onLoad(){
        this._bulletRect=this.bulletSprite.getRect();
        this.gun = find('hand/weapon', this.node);
    }
}
onEnable #
当组件的 enabled 属性从 false 变为 true 时,或者所在节点的 active 属性从 false 变为 true 时,会激活 onEnable 回调。倘若节点第一次被创建且 enabled 为 true,则会在 onLoad 之后,start 之前被调用。
start #
start 回调函数会在组件第一次激活前,也就是第一次执行 update 之前触发。start 通常用于初始化一些中间状态的数据,这些数据可能在 update 时会发生改变,并且被频繁的 enable 和 disable。
import { _decorator, Component, Node } from 'cc';
const { ccclass, property } = _decorator;

@ccclass("starttest")
export class starttest extends Component {

    private _timer: number = 0.0;

    start () {
        this._timer = 1.0;
    }

    update (deltaTime: number) {
        this._timer += deltaTime;
        if(this._timer >= 10.0){
            console.log('I am done!');
            this.enabled = false;
        }
     }
}
update #
游戏开发的一个关键点是在每一帧渲染前更新物体的行为,状态和方位。这些更新操作通常都放在 update 回调中。
import { _decorator, Component, Node } from 'cc';
const { ccclass, property } = _decorator;

@ccclass("updatetest")
export class updatetest extends Component {

    update (deltaTime: number) {
        this.node.setPosition(0.0,40.0 * deltaTime,0.0);
    }
}
增量时间deltaTime #
首先我们得知道动画是什么。动画,动画,动态的图画,即当图画连续动起来就能形成动画,那么在人类眼中,1秒中需要24张图画快速更换才能在大脑中形成视觉暂缓而成的动画。这里我们就把图画的24张叫做24帧,也就是说人眼中需要1秒24帧的动画才能流畅播放。
因为硬件设备不同性能,A设备1秒能60帧,B设备1秒能120帧。也就是说:每分钟,A能触发update方法60次,B能触发update方法120次。
假设,要让一个角色速度为3m/s,连续移动
update(){
	// 增量距离: 将要移动的距离 = 速度3m/s * 时长1s
	distance = speed * 1;
	// 累计距离:成为新的位置
	position = position + distance;
}
这样就会导致一个问题,如果A设备为60帧,B设备120帧,那么A设备的玩家一分钟移动了3 * 60 = 180m,B设备的玩家移动了3 * 120 = 360m。
所以为了解决这个问题,那么就引入了增量事件deltaTime,这个变量代表了,当前帧与上一帧中间的间隔时间,它并不是固定的,根据设备运行动态变动的,随时都不一样的。
update(deltaTime){
	// 增量距离: 将要移动的距离 = 速度3m/s * 时长1s
	distance = speed * deltaTime;
	// 累计距离:成为新的位置
	position = position + distance;
}
lateUpdate #
update 会在所有动画更新前执行,但如果我们要在动效(如动画、粒子、物理等)更新之后才进行一些额外操作,或者希望在所有组件的 update 都执行完之后才进行其它操作,那就需要用到 lateUpdate 回调。
import { _decorator, Component, Node } from 'cc';
const { ccclass, property } = _decorator;

@ccclass("lateupdatetest")
export class lateupdatetest extends Component {

    lateUpdate (deltaTime: number) {
        this.node.setPosition(0.0,50,0.0);
    }
}
onDisable #
当组件的 enabled 属性从 true 变为 false 时,或者所在节点的 active 属性从 true 变为 false 时,会激活 onDisable 回调。
onDestroy #
当组件或者所在节点调用了 destroy(),则会调用 onDestroy 回调,并在当帧结束时统一回收组件。
脚本使用 #
访问节点和组件 #
你可以在 属性检查器 里修改节点和组件,也能在脚本中动态修改。动态修改的好处是能够在一段时间内连续地修改属性、过渡属性,实现渐变效果。脚本还能够响应玩家输入,能够修改、创建和销毁节点或组件,实现各种各样的游戏逻辑。要实现这些效果,你需要先在脚本中获得你要修改的节点或组件。
获得组件所在的节点 #
获得组件所在的节点很简单,只要在组件方法里访问 this.node 变量
start() {
    let node = this.node;
    node.setPosition(0.0, 0.0, 0.0);
}
获得其他组件 #
如果你经常需要获得同一个节点上的其它组件,这就要用到 getComponent 这个 API。
import { _decorator, Component, Label } from 'cc';
const { ccclass, property } = _decorator;

@ccclass("test")
export class test extends Component {
    private label: any = null

    start() {
        this.label = this.getComponent(Label);
        let text = this.name + 'started';
        // Change the text in Label Component
        this.label.string = text;
    }
}
你也可以为 getComponent 传入一个类名。对用户定义的组件而言,类名就是脚本的文件名,并且 区分大小写。例如 “SinRotate.ts” 里声明的组件,类名就是 “SinRotate”。
let rotate = this.getComponent("SinRotate");
如果在节点上找不到你要的组件,getComponent 将返回 null。
获得其它节点及其组件 #
仅仅能访问节点自己的组件通常是不够的,脚本通常还需要进行多个节点之间的交互。例如,一门自动瞄准玩家的大炮,就需要不断获取玩家的最新位置。Cocos Creator 提供了一些不同的方法来获得其它节点或组件。
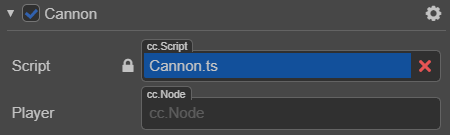
1、利用属性检查器设置节点 #
// Cannon.ts

import { _decorator, Component, Node } from 'cc';
const { ccclass, property } = _decorator;

@ccclass("Cannon")
export class Cannon extends Component {
    // 声明 Player 属性
    @property({ type: Node })
    private player = null;
}
这段代码在 properties 里面声明了一个 player 属性,默认值为 null,并且指定它的对象类型为 Node,然后就可以将节点拖到这个Player控件中。
2、查找子节点 #
有时候,游戏场景中会有很多个相同类型的对象,像是炮塔、敌人和特效,它们通常都有一个全局的脚本来统一管理。如果用 属性检查器 来一个一个将它们关联到这个脚本上,那工作就会很繁琐。为了更好地统一管理这些对象,我们可以把它们放到一个统一的父物体下,然后通过父物体来获得所有的子物体
// CannonManager.ts

import { _decorator, Component, Node } from 'cc';
const { ccclass, property } = _decorator;

@ccclass("CannonManager")
export class CannonManager extends Component {

    start() {
        let cannons = this.node.children;
        //...
    }

}
你还可以使用 getChildByName:
this.node.getChildByName("Cannon 01");
如果子节点的层次较深,你还可以使用 find,find 将根据传入的路径进行逐级查找:
find("Cannon 01/Barrel/SFX", this.node);
3、全局名字查找 #
当 find 只传入第一个参数时,将从场景根节点开始逐级查找:
this.backNode = find("Canvas/Menu/Back");
访问已有变量里的值 #
如果你已经在一个地方保存了节点或组件的引用,你也可以直接访问它们,例如现在可以通过import{ } from + 文件名(不含路径) 来获取到对方 exports 的对象。
Global
// Global.ts, now the filename matters
import { _decorator, Component, Node } from 'cc';
const { ccclass, property } = _decorator;

@ccclass("Global")
export class Global extends Component {

    public static backNode: any = null;
    public static backLabel: any = null;
}
Back
// Back.ts
import { _decorator, Component, Node, Label } from 'cc';
const { ccclass, property } = _decorator;
// this feels more safe since you know where the object comes from
import{Global}from "./Global";

@ccclass("Back")
export class Back extends Component {
    onLoad() {
        Global.backNode = this.node;
        Global.backLabel = this.getComponent(Label);
    }
}
常用节点和组件接口 #
节点状态和层级操作 #
假设我们在一个组件脚本中,通过 this.node 访问当前脚本所在节点。
1、激活或关闭节点 #
this.node.active = false;
设置 active 属性和在编辑器中切换节点的激活、关闭状态,效果是一样的。当一个节点是关闭状态时,它的所有组件都将被禁用。同时,它所有子节点,以及子节点上的组件也会跟着被禁用。要注意的是,子节点被禁用时,并不会改变它们的 active 属性,因此当父节点重新激活的时候它们就会回到原来的状态。
2、更改节点的父节点 #
this.node.parent = parentNode;
或者
this.node.removeFromParent();
parentNode.addChild(this.node);
3、索引节点的子节点 #
this.node.children //返回节点的所有子节点数组。
this.node.children.length //返回节点的子节点数量。
更改节点的变换(位置、旋转、缩放) #
1、更改节点位置 #
有以下两种方法:
- 使用
setPosition方法:this.node.setPosition(100, 50, 100);this.node.setPosition(new Vec3(100, 50, 100));
- 设置
position变量:this.node.position = new Vec3(100, 50, 100);
2、更改节点旋转 #
this.node.setRotation(90, 90, 90);
或通过欧拉角设置本地旋转:
this.node.setRotationFromEuler(90, 90, 90);
3、更改节点缩放 #
this.node.setScale(2, 2, 2);
创建和销毁节点 #
创建节点 #
import { _decorator, Component, Node } from 'cc';
const { ccclass, property } = _decorator;

@ccclass("test")
export class test extends Component {

    start(){
        let node =new Node('box');
        node.setPosition(0,0,-10);
    }
}
需要注意的是,在上述的示例中通过 new Node 创建出来的节点并不会主动添加到场景内,直至用户调用 director.getScene().addChild(node) 来添加到场景内或者通过 node.parent = {a valid node} 来作为某个节点的子节点。
克隆节点 #
import { _decorator, Component, Node,instantiate, director } from 'cc';
const { ccclass, property } = _decorator;

@ccclass("test")
export class test extends Component {

    @property({type:Node})
    private target: Node = null;

    start(){
        let scene = director.getScene();
        let node = instantiate(this.target);

        scene.addChild(node);
        node.setPosition(0, 0,-10);
    }
}
创建预制节点 #
import { _decorator, Component, Prefab, instantiate, director } from 'cc';
const { ccclass, property } = _decorator;

@ccclass("test")
export class test extends Component {

    @property({type:Prefab})
    private target: Prefab = null;

    start(){
        let scene = director.getScene();
        let node = instantiate(this.target);

        scene.addChild(node);
        node.setPosition(0,0,0);
    }
}
销毁节点 #
通过 node.destroy() 函数,可以销毁节点。值得一提的是,销毁节点并不会立刻被移除,而是在当前帧逻辑更新结束后,统一执行。当一个节点销毁后,该节点就处于无效状态,可以通过 isValid 判断当前节点是否已经被销毁。
import { _decorator, Component, Node } from 'cc';
const { ccclass, property } = _decorator;

@ccclass("test")
export class test extends Component {

    @property({type:Node})
    private target: Node = null;

    private positionz: number = -20;

    start(){
        // 5秒后销毁节点
        setTimeout(function () {
            this.target.destroy();
          }.bind(this), 5000);
    }
    update(deltaTime: number){
        console.info(this.target.isValid);
        this.positionz += 1*deltaTime;
        if (this.target.isValid) {
            this.target.setPosition(0.0,0.0,this.positionz);
          }
    }
}
计时器 #
开始一个计时器将每隔 5s 执行一次
this.schedule(function() {
    // 这里的 this 指向 component
    this.doSomething();
}, 5);
更灵活的计时器(将在 10 秒后开始计时,每 5 秒执行一次回调,重复 3 + 1 次。)
// 以秒为单位的时间间隔
let interval = 5;
// 重复次数
let repeat = 3;
// 开始延时
let delay = 10;
this.schedule(function() {
    // 这里的 this 指向 component
    this.doSomething();
}, interval, repeat, delay);
只执行一次的计时器
this.scheduleOnce(function() {
    // 这里的 this 指向 component
    this.doSomething();
}, 2);
取消计时器
this.count = 0;
this.callback = function () {
    if (this.count == 5) {
        // 在第六次执行回调时取消这个计时器
        this.unschedule(this.callback);
    }
    this.doSomething();
    this.count++;
}
this.schedule(this.callback, 1);
取消组件中所有的计时器:unscheduleAllCallbacks
加载和切换场景 #
在 Cocos Creator 中,我们使用场景文件名(不包含扩展名)来索引指代场景。并通过以下接口进行加载和切换操作:
director.loadScene("MyScene");
通过常驻节点进行场景资源管理和参数传递 #
引擎同时只会运行一个场景,当切换场景时,默认会将场景内所有节点和其他实例销毁。如果我们需要用一个组件控制所有场景的加载,或在场景之间传递参数数据,就需要将该组件所在节点标记为「常驻节点」,使它在场景切换时不被自动销毁,常驻内存。
director.addPersistRootNode(myNode);
上面的接口会将 myNode 变为常驻节点,这样挂在上面的组件都可以在场景之间持续作用,我们可以用这样的方法来储存玩家信息,或下一个场景初始化时需要的各种数据。 需要注意的是,目标节点必须为位于层级的根节点,否则设置无效。
如果要取消一个节点的常驻属性:
director.removePersistRootNode(myNode);
需要注意的是上面的 API 并不会立即销毁指定节点,只是将节点还原为可在场景切换时销毁的节点。
场景加载回调 #
director.loadScene("MyScene", onSceneLaunched);
onSceneLaunched 就是声明在本脚本中的一个回调函数,在场景加载后可以用来进一步的进行初始化或数据传递的操作。
预加载场景 #
director.loadScene 会在加载场景之后自动切换运行新场景,有些时候我们需要在后台静默加载新场景,并在加载完成后手动进行切换。那就可以预先使用 preloadScene 接口对场景进行预加载:
director.preloadScene("table", function () {
    console.log('Next scene preloaded');
});
之后在合适的时间调用 loadScene,就可以真正切换场景。
director.loadScene("table");
就算预加载还没完成,你也可以直接调用 director.loadScene,预加载完成后场景就会启动。