依赖注入与控制反转基础概念 #
在软件工程中,依赖注入(Dependency Injection, DI)和控制反转(Inversion of Control, IoC)是两个密切相关的设计原则,它们有助于创建松耦合、可测试且可维护的代码。虽然这些概念在Java等语言中更为普遍,但在Go语言中,它们同样重要且有多种实现方式。
依赖注入 #
依赖注入是一种设计模式,它允许我们将组件所需的依赖项"注入"到组件中,而不是让组件自己创建或查找这些依赖项。通过这种方式,组件变得更加解耦,更容易测试和维护。
简单来说,依赖注入主要解决的问题是:如何在不增加组件之间耦合度的前提下,让一个组件获得它所需的其他组件。
传统的依赖管理方式可能如下:
// 不使用依赖注入
type UserService struct {
    // UserService自己创建依赖
    repo *UserRepository
}

func NewUserService() *UserService {
    return &UserService{
        // 强耦合:服务直接依赖于具体的实现
        repo: NewUserRepository("mongodb://localhost:27017"),
    }
}
使用依赖注入后:
// 使用依赖注入
type UserService struct {
    repo UserRepository
}

func NewUserService(repo UserRepository) *UserService {
    return &UserService{
        repo: repo, // 依赖通过参数注入
    }
}
依赖注入的类型 #
依赖注入通常有以下几种类型:
- 构造函数注入:通过构造函数提供依赖项
- 方法注入:通过方法调用提供依赖项
- 属性注入:直接设置对象的公共属性
在Go语言中,由于没有类和对象的概念,依赖注入主要通过函数参数(类似于构造函数注入)和结构体字段(类似于属性注入)来实现。
依赖注入的优势 #
依赖注入提供了以下几个主要优势:
- 解耦:减少组件之间的直接依赖,使代码更模块化
- 可测试性:便于使用模拟(mock)对象进行单元测试
- 可维护性:清晰地表达依赖关系,使代码更易于理解和维护
- 灵活性:允许在运行时或配置时更改依赖关系
- 可重用性:组件更容易在不同上下文中重用
控制反转 #
控制反转是一个更广泛的概念,依赖注入是控制反转的一种实现方式。控制反转描述的是一种设计思想,即将对象的创建、管理和依赖关系的控制权从代码内部转移到外部。
在传统编程中,我们的代码直接控制对象的创建和依赖关系。而在控制反转模式下,这些控制权被"反转"了,由外部容器或框架来管理对象的创建和依赖关系。
控制反转的"反转"主要体现在两个方面:
- 依赖对象的获取方向反转:传统方式是组件主动获取依赖,控制反转是被动接收依赖
- 依赖关系控制权反转:从组件内部转移到外部
Go语言中依赖注入的基本实现 #
Go语言没有内置的依赖注入框架,但我们可以使用多种方式来实现依赖注入。Go的简洁设计使得依赖注入变得相对直观。
通过函数参数进行依赖注入 #
最简单的依赖注入方式是通过函数参数。这种方式与构造函数注入类似,适合大多数场景:
// 定义一个数据存储接口
type UserRepository interface {
    FindByID(id string) (*User, error)
    Save(user *User) error
}

// 定义一个服务,需要依赖数据存储
type UserService struct {
    repo UserRepository
}

// 通过函数参数注入依赖
func NewUserService(repo UserRepository) *UserService {
    return &UserService{
        repo: repo,
    }
}

// 使用依赖处理业务逻辑
func (s *UserService) GetUser(id string) (*User, error) {
    return s.repo.FindByID(id)
}
这种方式简单直观,是Go语言中最常见的依赖注入方式。调用者负责创建依赖并将其传递给服务:
// 创建具体的存储实现
repo := NewMySQLUserRepository(db)

// 将依赖注入到服务中
userService := NewUserService(repo)

// 使用服务
user, err := userService.GetUser("123")
通过结构体字段进行依赖注入 #
除了在创建时注入依赖,我们也可以通过设置结构体的公开字段来注入依赖:
type AppConfig struct {
    DatabaseURL string
    APIKey      string
    Debug       bool
}

type Application struct {
    Config       AppConfig        // 通过结构体字段注入配置
    UserRepo     UserRepository
    AuthService  AuthService
}

// 使用
app := Application{}
app.Config = loadConfig()
app.UserRepo = NewUserRepository(app.Config.DatabaseURL)
app.AuthService = NewAuthService(app.UserRepo, app.Config.APIKey)
这种方式在某些简单场景下有用,但通常我们更倾向于使用函数参数方式,因为它可以确保对象在创建时就获得所有必要的依赖,避免了部分初始化的对象。
使用接口实现依赖反转 #
依赖注入在与接口结合使用时效果最佳。通过定义接口,我们使高层组件依赖于抽象而非具体实现,这正是依赖反转原则(Dependency Inversion Principle)的核心思想。
// 定义数据库接口
type Database interface {
    Query(query string) ([]Row, error)
    Execute(command string) error
}

// 定义使用数据库的服务
type ProductService struct {
    db Database
}

func NewProductService(db Database) *ProductService {
    return &ProductService{db: db}
}

// 创建具体数据库实现
type MySQLDatabase struct {
    // ...实现细节
}

func (m *MySQLDatabase) Query(query string) ([]Row, error) {
    // 实现MySQL查询
    return nil, nil
}

func (m *MySQLDatabase) Execute(command string) error {
    // 实现MySQL命令执行
    return nil
}

// 使用依赖注入
db := &MySQLDatabase{}
productService := NewProductService(db)
通过这种方式,ProductService不依赖于具体的数据库实现,而是依赖于Database接口。这样我们可以轻松地替换数据库实现,例如用于测试:
// 创建测试用的模拟数据库
type MockDatabase struct {
    // ...模拟实现
}

func (m *MockDatabase) Query(query string) ([]Row, error) {
    // 返回预设的测试数据
    return []Row{/* 预设数据 */}, nil
}

func (m *MockDatabase) Execute(command string) error {
    // 模拟命令执行
    return nil
}

// 在测试中使用模拟数据库
func TestProductService(t *testing.T) {
    mockDB := &MockDatabase{}
    service := NewProductService(mockDB)

    // 测试服务的行为...
}
使用函数类型作为依赖 #
在Go中,函数是一等公民,我们可以将函数类型用作依赖项,这在某些场景下非常有用:
// 定义一个记录器函数类型
type LoggerFunc func(format string, args ...interface{})

// 使用函数类型作为依赖
type Worker struct {
    log LoggerFunc
}

func NewWorker(log LoggerFunc) *Worker {
    // 如果没有提供日志函数,使用默认实现
    if log == nil {
        log = func(format string, args ...interface{}) {
            fmt.Printf(format+"\n", args...)
        }
    }
    return &Worker{log: log}
}

func (w *Worker) DoWork() {
    w.log("Starting work...")
    // 执行工作...
    w.log("Work completed")
}

// 使用示例
worker := NewWorker(func(format string, args ...interface{}) {
    log.Printf("[WORKER] "+format, args...)
})
worker.DoWork()
这种方法特别适合依赖比较简单的情况,可以避免为简单功能定义完整接口。
常见的依赖注入模式 #
在Go语言中,有几种流行的依赖注入模式,下面我们将探讨这些模式以及它们的适用场景。
构造函数注入 #
构造函数注入是Go中最常见的依赖注入模式,我们在创建对象时通过构造函数传入所有需要的依赖:
type Service struct {
    repo      Repository
    cache     Cache
    logger    Logger
    validator Validator
}

func NewService(repo Repository, cache Cache, logger Logger, validator Validator) *Service {
    return &Service{
        repo:      repo,
        cache:     cache,
        logger:    logger,
        validator: validator,
    }
}
优点:
- 确保创建的对象始终处于有效状态(有所有必要的依赖)
- 依赖关系明确,容易理解
- 适合大多数场景
缺点:
- 当依赖项很多时,构造函数参数列表可能变得很长
- 如果某些依赖是可选的,需要创建多个构造函数或使用其他模式
功能选项模式 #
当一个组件有许多可选配置或依赖时,功能选项模式(Functional Options Pattern)非常有用:
type ServerOption func(*Server)

func WithPort(port int) ServerOption {
    return func(s *Server) {
        s.port = port
    }
}

func WithLogger(logger Logger) ServerOption {
    return func(s *Server) {
        s.logger = logger
    }
}

func WithCache(cache Cache) ServerOption {
    return func(s *Server) {
        s.cache = cache
    }
}

type Server struct {
    port    int
    logger  Logger
    cache   Cache
    timeout time.Duration
}

func NewServer(options ...ServerOption) *Server {
    // 设置默认值
    server := &Server{
        port:    8080,
        logger:  &DefaultLogger{},
        timeout: 30 * time.Second,
    }

    // 应用提供的选项
    for _, option := range options {
        option(server)
    }

    return server
}

// 使用示例
server := NewServer(
    WithPort(9000),
    WithLogger(customLogger),
    WithCache(redisCache),
)
优点:
- 提供了极大的灵活性,用户只需指定他们关心的选项
- 支持默认值,减少配置负担
- 构造函数签名保持简洁
- 可以随时添加新选项而不破坏现有代码
缺点:
- 相比简单的构造函数,实现略微复杂
- 可能使依赖关系不那么明显
配置对象模式 #
当依赖项较多时,可以使用配置对象来组织它们:
type ServiceConfig struct {
    Repository Repository
    Cache      Cache
    Logger     Logger
    Timeout    time.Duration
    MaxRetries int
}

type Service struct {
    repo      Repository
    cache     Cache
    logger    Logger
    timeout   time.Duration
    maxRetries int
}

func NewService(config ServiceConfig) *Service {
    // 验证配置
    if config.Repository == nil {
        panic("repository is required")
    }

    // 设置默认值
    logger := config.Logger
    if logger == nil {
        logger = &DefaultLogger{}
    }

    timeout := config.Timeout
    if timeout == 0 {
        timeout = 30 * time.Second
    }

    return &Service{
        repo:      config.Repository,
        cache:     config.Cache,
        logger:    logger,
        timeout:   timeout,
        maxRetries: config.MaxRetries,
    }
}

// 使用示例
service := NewService(ServiceConfig{
    Repository: myRepo,
    Cache:      myCache,
    MaxRetries: 3,
})
优点:
- 将多个相关参数组织成一个结构
- 随着依赖的增加,构造函数签名保持不变
- 参数命名明确,提高可读性
缺点:
- 必须创建额外的结构体
- 可能鼓励传递不必要的空值
服务定位器模式 #
服务定位器(Service Locator)提供了一个中央注册表,组件可以从中获取其依赖:
type ServiceLocator struct {
    services map[reflect.Type]interface{}
    mu       sync.RWMutex
}

func NewServiceLocator() *ServiceLocator {
    return &ServiceLocator{
        services: make(map[reflect.Type]interface{}),
    }
}

func (sl *ServiceLocator) Register(service interface{}) {
    sl.mu.Lock()
    defer sl.mu.Unlock()

    t := reflect.TypeOf(service)
    sl.services[t] = service
}

func (sl *ServiceLocator) Get(t reflect.Type) interface{} {
    sl.mu.RLock()
    defer sl.mu.RUnlock()

    return sl.services[t]
}

// 使用示例
locator := NewServiceLocator()
locator.Register(&MySQLRepository{})
locator.Register(&RedisCache{})

// 在组件中获取依赖
repo := locator.Get(reflect.TypeOf((*Repository)(nil)).Elem()).(Repository)
注意:虽然服务定位器模式在某些场景下有用,但它在Go社区中通常不被推荐,因为它隐藏了依赖关系,使代码难以理解和测试。大多数Go开发者更喜欢显式依赖注入。
容器化依赖注入 #
随着应用程序规模增长,手动管理所有依赖关系可能变得复杂。在这种情况下,可以使用依赖注入容器:
type Container struct {
    providers map[reflect.Type]provider
    instances map[reflect.Type]interface{}
    mu        sync.RWMutex
}

type provider struct {
    constructor interface{}
    singleton   bool
}

func NewContainer() *Container {
    return &Container{
        providers: make(map[reflect.Type]provider),
        instances: make(map[reflect.Type]interface{}),
    }
}

// 注册服务提供者
func (c *Container) Provide(constructor interface{}, singleton bool) {
    c.mu.Lock()
    defer c.mu.Unlock()

    t := reflect.TypeOf(constructor)
    if t.Kind() != reflect.Func {
        panic("constructor must be a function")
    }

    returnType := t.Out(0)
    c.providers[returnType] = provider{
        constructor: constructor,
        singleton:   singleton,
    }
}

// 解析服务
func (c *Container) Resolve(t reflect.Type) interface{} {
    c.mu.RLock()
    // 检查是否已有实例(用于单例)
    if instance, ok := c.instances[t]; ok {
        c.mu.RUnlock()
        return instance
    }
    c.mu.RUnlock()

    c.mu.Lock()
    defer c.mu.Unlock()

    // 双重检查锁定
    if instance, ok := c.instances[t]; ok {
        return instance
    }

    provider, ok := c.providers[t]
    if !ok {
        panic(fmt.Sprintf("no provider for %v", t))
    }

    constructorVal := reflect.ValueOf(provider.constructor)
    constructorType := constructorVal.Type()

    // 解析构造函数的依赖
    args := make([]reflect.Value, constructorType.NumIn())
    for i := 0; i < constructorType.NumIn(); i++ {
        argType := constructorType.In(i)
        args[i] = reflect.ValueOf(c.Resolve(argType))
    }

    // 调用构造函数
    result := constructorVal.Call(args)[0].Interface()

    // 如果是单例,保存实例
    if provider.singleton {
        c.instances[t] = result
    }

    return result
}

// 使用示例
container := NewContainer()

// 注册服务
container.Provide(NewRepository, true)
container.Provide(NewService, true)

// 解析服务
service := container.Resolve(reflect.TypeOf((*Service)(nil)).Elem()).(*Service)
注意:上面的实现是简化的,实际的依赖注入容器会更复杂。在Go中,使用代码生成工具(Wire)通常比运行时反射更受欢迎。
Wire #
随着应用程序的增长,手动管理依赖关系可能变得复杂。Google的Wire是一个编译时依赖注入工具,它通过代码生成简化了依赖管理。
Wire是一个代码生成工具,而不是运行时框架。它在编译时解析依赖关系并生成用于初始化应用程序的代码,具有以下优势:
- 编译时检查:依赖关系在编译时验证,避免运行时错误
- 零运行时依赖:生成的代码不依赖于Wire库
- 类型安全:利用Go的类型系统确保依赖正确匹配
- 快速执行:没有反射开销,初始化性能与手写代码相同
- 透明性:生成的代码易于理解和调试
Wire的核心概念包括:
- Provider:提供依赖项的函数
- Injector:将所有依赖项连接起来的函数
- ProviderSet:提供者的集合,便于组织和复用
安装 Wire #
这一步是为了安装 Wire 的命令行工具wire
go install github.com/google/wire/cmd/wire@latest
基本使用示例 #
代码中导入 wire 依赖
go get -u github.com/google/wire
项目结构如下
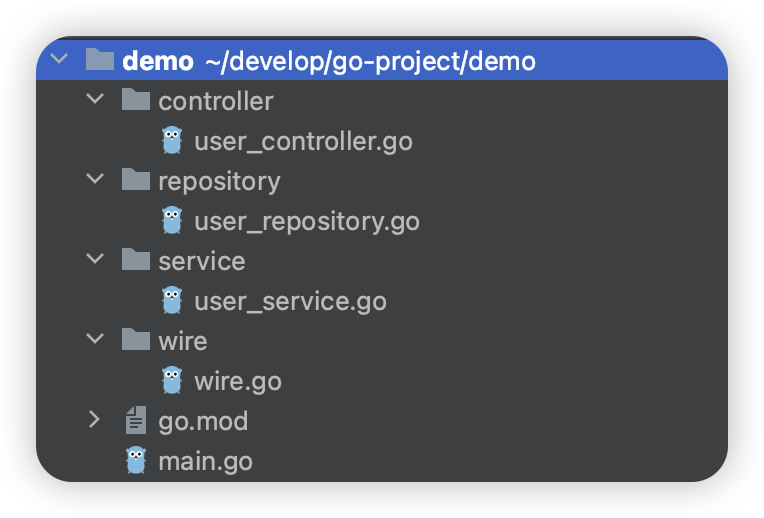
user_repository.go
package repository

type UserRepository struct {
}

func NewUserRepository() *UserRepository {
	return &UserRepository{}
}

func (u *UserRepository) Select() map[string]string {
	return map[string]string{
		"name": "tom",
		"age":  "18",
	}
}
user_service.go
package service

import "ygang.top/demo/repository"

type UserService struct {
	UserRepo *repository.UserRepository
}

func NewUserService(userRepo *repository.UserRepository) *UserService {
	return &UserService{
		UserRepo: userRepo,
	}
}

func (u *UserService) SelectUser() map[string]string {
	return u.UserRepo.Select()
}
user_controller.go
package controller

import "ygang.top/demo/service"

type UserController struct {
	UserService *service.UserService
}

func NewUserController(userService *service.UserService) *UserController {
	return &UserController{
		UserService: userService,
	}
}

func (u *UserController) SelectUser() map[string]string {
	return u.UserService.SelectUser()
}
创建一个wire.go文件定义依赖关系:
//go:build wireinject
// +build wireinject

package wire

import (
	"github.com/google/wire"
	"ygang.top/demo/controller"
	"ygang.top/demo/repository"
	"ygang.top/demo/service"
)

// 创建并初始化 UserController
func InitUserController() *controller.UserController {
	wire.Build(
		controller.NewUserController,
		service.NewUserService,
		repository.NewUserRepository,
	)
	return &controller.UserController{} // 返回值会被 Wire 忽略并替换
}
在wire/目录中,执行wire命令,会生成一个wire_gen.go的文件,其中包含初始化组件的代码:
// Code generated by Wire. DO NOT EDIT.

//go:generate go run -mod=mod github.com/google/wire/cmd/wire
//go:build !wireinject
// +build !wireinject

package wire

import (
	"ygang.top/demo/controller"
	"ygang.top/demo/repository"
	"ygang.top/demo/service"
)

// Injectors from wire.go:

// 创建并初始化 UserController
func InitUserController() *controller.UserController {
	userRepository := repository.NewUserRepository()
	userService := service.NewUserService(userRepository)
	userController := controller.NewUserController(userService)
	return userController
}
在main.go中,获取UserController,并使用
package main

import (
	"fmt"
	"ygang.top/demo/wire"
)

func main() {
	controller := wire.InitUserController()
	fmt.Println(controller.SelectUser())
}
Wire高级特性 #
Provider Sets #
Provider Sets允许我们将提供者分组,便于组织和重用:
package db

import "github.com/google/wire"

func NewDBConnection(...) *Connection {...}
func NewUserRepository(conn *Connection) *UserRepository {...}
func NewProductRepository(conn *Connection) *ProductRepository {...}

// DBSet 提供所有数据库相关的依赖
var DBSet = wire.NewSet(
    NewDBConnection,
    NewUserRepository,
    NewProductRepository,
)
在另一个包中使用:
package main

import (
    "myapp/db"
    "github.com/google/wire"
)

func InitializeApp() *Application {
    wire.Build(
        db.DBSet,
        NewService,
        NewApplication,
    )
    return nil
}
绑定接口 #
Wire支持将具体类型绑定到接口:
type UserRepository interface {
    FindByID(id string) (*User, error)
}

type MySQLUserRepository struct {
    // ...
}

func NewMySQLUserRepository() *MySQLUserRepository {
    // ...
}

func (r *MySQLUserRepository) FindByID(id string) (*User, error) {
    // ...
}

// 创建Provider Set,将MySQLUserRepository绑定到UserRepository接口
var RepositorySet = wire.NewSet(
    NewMySQLUserRepository,
    wire.Bind(new(UserRepository), new(*MySQLUserRepository)),
)
提供值 #
除了使用构造函数,我们还可以直接提供值:
var ConfigSet = wire.NewSet(
    wire.Value(DatabaseConfig{
        Host:     "localhost",
        Port:     5432,
        Username: "user",
        Password: "password",
    }),
)
结构体字段注入 #
Wire支持通过FieldsOf函数提取结构体字段作为依赖
type Config struct {
    DatabaseURL string
    APIKey      string
}

func NewConfig() Config {
    return Config{
        DatabaseURL: "postgres://localhost/myapp",
        APIKey:      "secret-key",
    }
}

var ConfigSet = wire.NewSet(
    NewConfig,
    wire.FieldsOf(new(Config), "DatabaseURL", "APIKey"),
)
清理函数 #
对于需要清理的资源,Wire支持使用wire.Cleanup:
func NewDatabase() (*Database, func(), error) {
    db, err := sql.Open("postgres", "...")
    if err != nil {
        return nil, nil, err
    }

    cleanup := func() {
        db.Close()
    }

    return &Database{DB: db}, cleanup, nil
}

func InitializeApp() (*App, func(), error) {
    wire.Build(NewDatabase, NewService, NewApp)
    return nil, nil, nil
}
生成的代码会正确处理清理函数:
func InitializeApp() (*App, func(), error) {
    database, cleanup, err := NewDatabase()
    if err != nil {
        return nil, nil, err
    }

    service := NewService(database)
    app := NewApp(service)

    return app, cleanup, nil
}
Wire最佳实践 #
使用Wire时的一些最佳实践:
- 组织Provider Sets:按照模块或功能将提供者分组
- 保持提供者函数简单:每个提供者函数应只负责创建一个组件
- 使用接口:通过接口和
wire.Bind分离抽象和实现 - 处理配置:使用wire.Value或专门的配置提供者函数
- 错误处理:提供者函数应返回错误而不是panic
- 测试性:设计组件便于在测试中替换依赖